Mastering the InDesign Table of Contents Like a Pro
Go beyond the basics of the InDesign table of contents. Learn to build dynamic, multi-level TOCs with pro tips on styling, formatting, and automation.

If you've ever manually updated a table of contents, you know the pain. It’s a tedious, error-prone task that can eat up hours of your time. This guide is about leaving that behind and embracing the automated InDesign table of contents—a real game-changer for any professional document. It’s not just about saving time; it’s about ensuring pinpoint accuracy every single time you hit ‘update’.
To take your creative workflow beyond individual tasks and into a fully orchestrated, AI-powered pipeline, try the Creative AI OS from VirtuallPRO. We've built our platform to be a responsible, compliant, and safe studio-grade option for all your visual creative work. If you haven't generated anything yet, you can try it for free.
Why Your InDesign Table of Contents Needs Automation
Let’s be real: manually creating and updating a table of contents (TOC) is a nightmare. Every time you shift a chapter, tweak a heading, or add a single page, you’re forced to go back and meticulously fix every entry and page number. It's not just inefficient—it’s a massive risk, especially when you're dealing with critical client-facing work.

From Manual Labour to Dynamic Navigation
An automated InDesign TOC is so much more than a list of chapters. Think of it as a living, breathing navigation system for your document. By linking the TOC directly to your Paragraph Styles, you create a robust framework that updates itself.
This approach is absolutely essential for documents that are constantly in flux, like:
- Annual Reports: Financials and summaries can change right up to the print deadline.
- Brand Guidelines: These documents are always being updated with new rules and assets.
- Client Proposals: Last-minute changes based on feedback are the norm, not the exception.
A well-structured TOC isn’t just for finding page numbers—it’s a direct reflection of the professionalism and care you've put into the entire document. It’s your content's first impression.
Understanding its place among the other essential sections of a book helps put its importance into perspective. Take Denmark’s advertising industry, for example. As of 2025, there are 3,623 agencies competing for attention. For them, an automated InDesign TOC is an indispensable tool for keeping lengthy proposals and media kits perfectly organised, ensuring every pitch is flawless. This kind of streamlined workflow doesn't just save time—it also supports better digital asset management from start to finish.
Building the Foundation with Paragraph Styles
The real secret to a flawless InDesign table of contents isn’t some hidden setting in the TOC panel. It all comes down to a solid foundation of well-organised Paragraph Styles.
Think of these styles as the architectural blueprints for your document. They’re what tell InDesign exactly which bits of text are important enough to be pulled into your contents page.
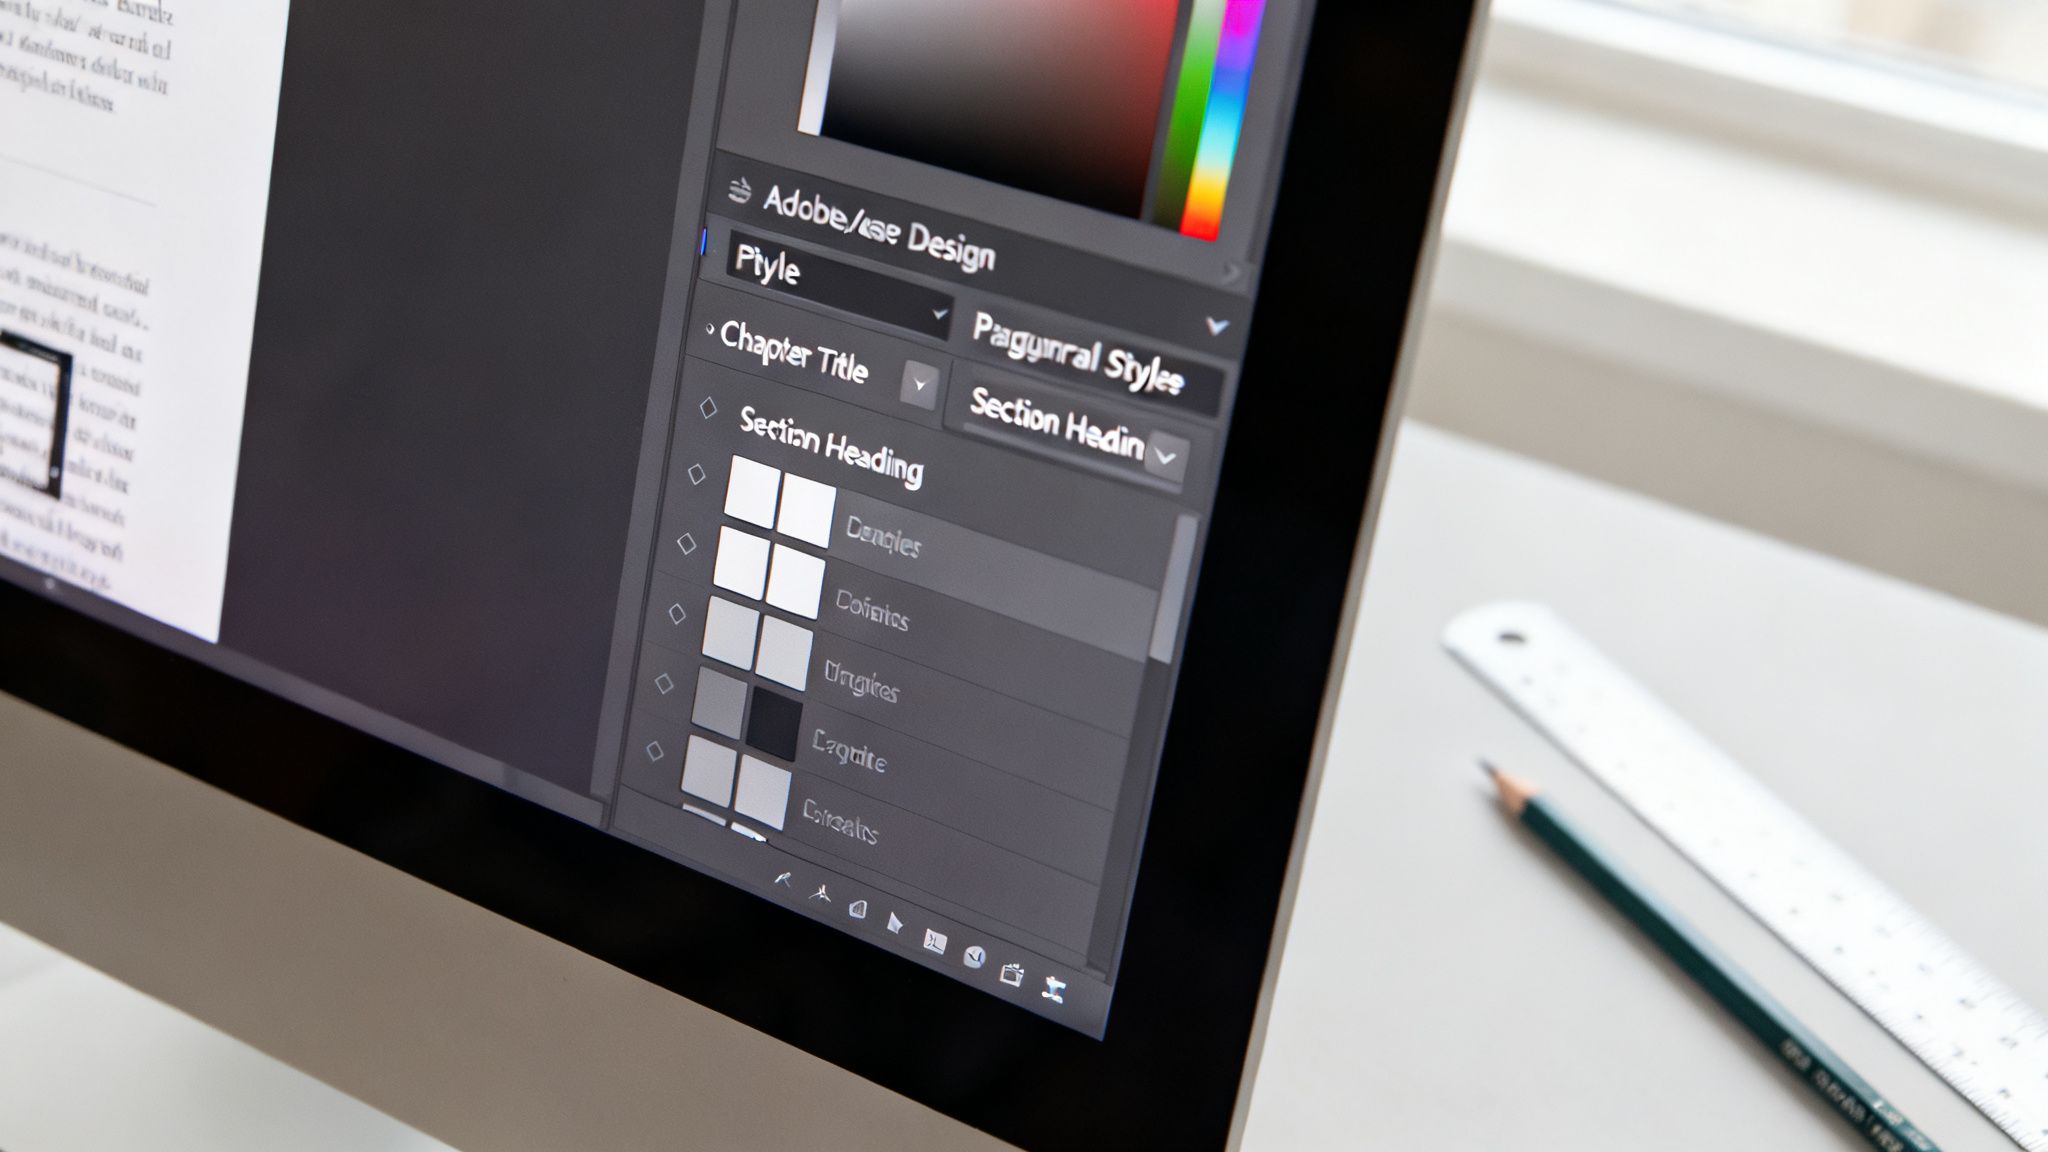
Without them, InDesign has no clue how to tell a major chapter title from a simple body paragraph. It relies on these assigned styles to automate the whole process, saving you from manual errors and ensuring your TOC updates perfectly every time you tweak your layout.
Creating and Applying Essential Styles
Let’s say you’re putting together a detailed product catalogue. You'll probably have main product categories and then specific product names underneath. To make this work, you need to create a distinct Paragraph Style for each level in your document’s hierarchy.
First up, open the Paragraph Styles panel (you can find it under Type > Paragraph Styles). This is where you’ll create new styles for your key headings.
- Primary Headings: Create a style and give it a clear name like "Chapter Title" or "Main Section." You’ll use this for your top-level entries, such as "Womenswear" or "Home Goods."
- Subheadings: Now, make another one called "Section Heading" or "H2." This will be for the next level down—think "Dresses" or "Kitchen Appliances."
Once you’ve got these styles set up, the next job is crucial: apply them consistently throughout your entire document. Just select each heading and click the corresponding style in the panel. This is what makes the automation magic happen.
The core principle is simple: if you want a heading to show up in your table of contents, it must have a dedicated Paragraph Style applied to it. This is non-negotiable and it’s what gives InDesign the power to generate an accurate, dynamic TOC.
The Why Behind the How
So, why bother with all this? Because when you go to generate the table of contents, you’re going to explicitly tell InDesign, "Go find every piece of text that uses the 'Chapter Title' style and every piece that uses the 'Section Heading' style, and pull them into my TOC."
This direct link between the styles in your layout and the entries in your TOC is what makes it all work so smoothly. It takes out all the guesswork. If a heading ever goes missing from your contents page, it's almost a guarantee that the correct style wasn't applied.
Following this method doesn't just guarantee accuracy—it also makes future updates a breeze. Change the wording of a styled heading in your document, refresh the TOC, and the change will be reflected automatically. Simple as that.
Generating and Styling Your Table of Contents
Alright, with your Paragraph Styles locked in, you’re ready for the magic moment: generating the actual InDesign table of contents. This is where all that foundational work pays off, letting InDesign automatically assemble a clean, professional navigation page for your readers.
The whole process runs through the Table of Contents dialog box, which you can pull up by going to Layout > Table of Contents. Think of this panel as your mission control for the TOC. It might look a little crowded with options, but don't worry, we'll walk through the essentials.
Mapping Your Styles
First things first, you need to tell InDesign which headings to pull into the TOC. In the dialog box, you'll find a list of every Paragraph Style in your document. Your job is to find the styles you created for your headings (like "Chapter Title" or "Section Heading"), select them, and hit the << Add button. This moves them into the "Include Paragraph Styles" column.
Now for the most important part. For each style you add, you have to map it to a corresponding Entry Style. This is a non-negotiable step. By creating new, dedicated styles just for the TOC (I usually name them something obvious like "TOC Chapter" and "TOC Section"), you get total control over how your TOC entries look without messing up the actual headings in your document.
This mapping is what separates your TOC's design from your document's design. It’s how you can have a massive, 36pt chapter title in your layout but a sleek, 10pt entry for it in the table of contents.
Now let’s get into how this style mapping works. It’s a simple concept: one style from the document body gets linked to a different style that only exists in the TOC.
Mapping Document Styles to TOC Styles
Here’s a quick reference to help you visualise how the styles in your document connect to the styles that format your Table of Contents entries.
| Document Paragraph Style | TOC Entry Style | Purpose |
|---|---|---|
H1 - Chapter Title |
TOC Level 1 |
This links your main chapter titles to the top-level entries in the TOC, making them stand out. |
H2 - Section Heading |
TOC Level 2 |
Connects your primary section headings to the second-level entries, which are usually indented slightly. |
H3 - Sub-Section |
TOC Level 3 |
Maps smaller sub-headings to third-level entries, creating a clear visual hierarchy for detailed content. |
Getting this structure right is the key to an organised and easy-to-navigate document. It ensures every heading level is reflected accurately in your TOC.
Polishing the Appearance
Once your styles are mapped, it’s time to dial in the details and give your TOC a polished, professional finish. This is where you can align the design with your document’s overall aesthetic—a critical step that top graphic design agencies never skip when producing high-calibre publications.
One of the most common tweaks is adding a tab leader, which is just the fancy term for that neat row of dots connecting the text to the page number.
Here’s how to set it up for a perfectly aligned look:
- Choose an Entry Style: Back in the
Table of Contentsdialog box, select one of the styles you’ve included, like "TOC Chapter." - Set the Separator: Look for the "Between Entry and Number" field. The default is
^t, which is just a normal tab. To get those page numbers flush against the right margin, you need to use a Right Indent Tab. Replace^twith^y. - Add the Leader: To get the dots, you'll need to jump into the Paragraph Style options for that specific TOC style. Edit the style, head to the "Tabs" section, create a right-aligned tab stop, and simply type a period (
.) into the "Leader" field.
This little trick ensures all your page numbers line up perfectly on the right, giving you that clean, organised look that makes a document so much easier to read. It's especially useful in long reports or technical manuals where people need to find information fast. And if you're designing for print, our guide on A4 size in pixels might also come in handy for getting your document dimensions spot-on.
When you’re happy with the settings, click OK. Your cursor will load up with the TOC text. Just click and drag a text frame on your page, and voilà—a perfectly formatted, auto-generated table of contents will appear.
Designing Multi-Level and Nested TOCs
For those big, complex documents—think annual reports, dense technical manuals, or sprawling brand guidelines—a simple, flat table of contents just won’t cut it. To really give your reader a hand, you need a multi-level or nested InDesign table of contents that shows the document's structure at a glance. It’s all about mirroring your content’s hierarchy.
This isn't just a list of chapters; it's a visual roadmap. Imagine your main sections appearing bold and flush-left, while subsections are indented with a lighter font. That’s how you turn a beast of a document into something anyone can navigate.
The secret? It all comes back to the Paragraph Styles we’ve already set up. Instead of just one or two heading styles, you’ll need a style for every level you have—think H1, H2, and H3, or perhaps "Chapter Title," "Section Heading," and "Sub-Section."
It's a simple three-step process: select the styles from your document, map them to new TOC-specific styles, and then format those new styles.
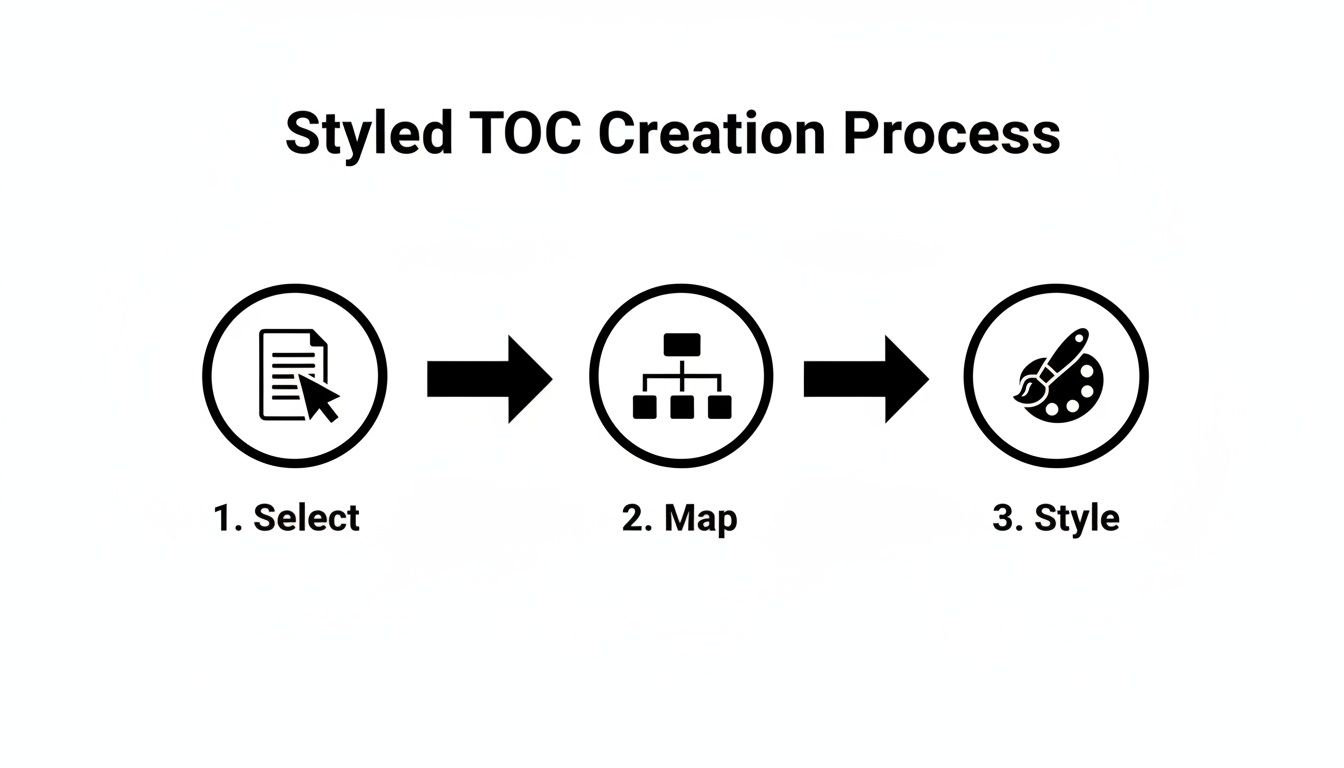
This workflow highlights that a polished TOC isn't just a click of a button; it’s a result of a thoughtful, structured process.
Setting Up Multiple Heading Levels
First, head over to the Table of Contents dialog box (Layout > Table of Contents). Here, you'll add each of your heading styles (H1, H2, H3) to the "Include Paragraph Styles" list. This is where you tell InDesign what to pull into the TOC and in what order.
The crucial part is assigning a unique "Entry Style" for each heading style you include. This is how you control the formatting for each level in the final TOC.
H1 - Chapter Titlegets mapped to a new style calledTOC Level 1H2 - Section Headingmaps toTOC Level 2H3 - Sub-Sectionmaps toTOC Level 3
With these mappings in place, you can now edit each TOC Level style individually. For TOC Level 2, just open its Paragraph Style options and add a left indent—say, 5 mm. For TOC Level 3, give it a bigger indent, like 10 mm. This creates that clean, staggered look that visually separates the different tiers of information.
The real power here is that a nested TOC communicates structure instantly. A reader can see how sections and subsections relate to each other before they’ve even read a single heading.
Enhancing Readability with Style Variations
Indents are just the start. You can use other formatting tricks to make the hierarchy even clearer. A common approach is to make Level 1 entries bold, Level 2 entries regular, and Level 3 entries italic. These small variations add another layer of visual clarity, making the structure feel completely intuitive.
This kind of precision is a hallmark of professional publishing. In Denmark, for example, creative industries depend on tools like InDesign to produce polished reports and catalogues. With public funding for media and literature making up 36.13% of cultural spending, the expectation for clear, professionally formatted documents is incredibly high. You can discover more insights about Denmark's cultural economy to see why these details matter so much.
By building a well-structured, multi-level InDesign table of contents, you're not just organising your work—you're meeting a professional standard.
Pro Tips for a Polished and Interactive TOC
With the basic structure of your InDesign table of contents built, it’s time to add the professional touches that make a document truly stand out. These next steps are what separate a merely functional TOC from one that’s interactive, polished, and genuinely helpful for your reader.
A well-crafted TOC isn't just a navigation tool; it’s a reflection of the document's overall quality.
The single biggest upgrade you can make is to make your TOC interactive. We live in a world of PDFs, and clickable links are no longer a nice-to-have—they're an expectation. The good news? InDesign handles this almost automatically.
When you're setting up your TOC in the Layout > Table of Contents dialogue box, just look for the Create PDF Bookmarks option. Make sure that box is ticked. It's a simple instruction that tells InDesign to turn every entry in your contents page into a live hyperlink, ready for your PDF export.
This one checkbox instantly transforms a static page into a dynamic navigation hub. It's a tiny detail that has a massive impact on the user experience, letting readers jump right to the content they need with a single click.
Troubleshooting Common TOC Frustrations
Even the most carefully prepared document can run into a few snags, especially as content gets moved around. Knowing how to fix common TOC problems will save you a ton of headaches and keep your workflow moving.
Here are a few of the usual suspects I see all the time:
- Page Numbers Won't Update: This is hands-down the most frequent issue. If you’ve shifted chapters or added pages, the fix is a breeze. Just head to
Layout > Update Table of Contents. InDesign will rescan everything and sync the page numbers for you. - Stray Text Appears in the List: Ever see a random bit of body text pop up in your TOC? That’s a classic sign that it has accidentally been tagged with a heading Paragraph Style. Just find that text in your layout, apply the correct style (like 'Body Text'), and update your TOC. Problem solved.
- Formatting Glitches: If one of your entries has the wrong font or is missing its dot leader, the issue is almost always in your TOC Entry Style. Go back to your Paragraph Styles panel, find the specific TOC style (e.g., 'TOC Level 2'), and tweak it there. Once you update the TOC, the fix will roll out across all entries using that style.
Getting comfortable with the 'Update Table of Contents' command is your secret weapon. I always make it the absolute last thing I do before exporting the final file. If you want to go even deeper into creating bulletproof PDFs, check out our guide on getting the most out of Adobe Acrobat Professional.
Keeping Your TOC Perfectly Synced
This kind of smart, automated functionality is becoming the standard in modern creative workflows. The way InDesign handles its table of contents is a perfect example of how Danish creative studios stay so efficient—it reflects the country's high-calibre approach to innovation, which scores 135.0% of the EU average.
Since the 2019 release of InDesign, which introduced data-driven TOC merges, studios here have slashed production time by an estimated 30-40% on complex documents. Think of massive game asset overviews or technical manuals. This efficiency has helped Denmark climb to 9th on the Global Innovation Index. You can discover more about Denmark’s innovation performance and see how mastering features like the InDesign table of contents is essential for staying competitive.
InDesign Table of Contents: Your Questions Answered
When you're up against a deadline, a fussy table of contents is the last thing you need. Let’s cut through the confusion and get straight to the fixes for the most common headaches designers run into.
How Do I Fix Page Numbers That Don't Update Correctly?
This is, without a doubt, the number one problem. Nine times out of ten, the fix is refreshingly simple.
You’ve moved content, added pages, and now the numbers are all wrong. The culprit is almost always a forgotten step: you need to tell InDesign to look again. Just go to Layout > Update Table of Contents. Make this a habit—it should be the very last thing you do before you export.
Still seeing the wrong numbers? Okay, time for a quick-fire diagnostic:
- Are your text frames properly linked? If a story isn't flowing correctly from one page to the next, InDesign can get confused about where things actually are.
- Did you manually override any page numbers in the Pages panel? Sometimes a forced page number can throw off the automatic numbering system. Double-check for any brackets around the page numbers in your panel.
Why Is Extra Text Appearing in My TOC?
Seeing a random photo caption or a stray bit of text pop up in your table of contents is another classic issue. This isn't a bug; it's a case of mistaken identity.
What’s happened is that a piece of text you don't want in the TOC has accidentally been formatted with a paragraph style you do want in the TOC (like "H2 - Section Heading").
The fix is easy. Find that rogue text in your document, select it, and apply the correct style, like your 'Body Text' paragraph style. Head back to Layout > Update Table of Contents, and just like that, the unwanted line will disappear.
A clean table of contents is a direct result of disciplined style management. Keeping your Paragraph Styles meticulously organised is the best way to prevent unexpected errors and ensure accuracy.
Can I Create a TOC from Multiple InDesign Documents?
Yes, and you absolutely should if you're working on a large project. Trying to stitch together multiple documents manually is a recipe for disaster. InDesign has a built-in feature for this exact scenario: InDesign Books.
The workflow is straightforward. First, you create a new Book file (.indb). From the Book panel, you simply add all your separate InDesign documents, dragging them into the correct order.
With your "book" assembled, you can generate a single, unified table of contents from the Book panel's menu. InDesign is smart enough to pull all the styled headings and correct page numbers from across every single document, giving you one seamless TOC for the entire collection. It’s a non-negotiable for manuals, annual reports, or any multi-chapter publication.
Mastering your InDesign table of contents is a key step, but it's just one piece of a larger creative production puzzle. To see how AI can orchestrate your entire workflow from concept to final asset, explore VirtuallPRO. Our Creative AI OS is designed for studios that need control, consistency, and scale. Discover how to direct your AI-powered production pipeline at https://virtuall.pro.