Mastering the Green Screen Background for Flawless Results
Create a flawless green screen background with this guide. Learn professional lighting, keying, and compositing techniques for studio-grade video.

Diving into the world of green screen is one of the most powerful steps you can take as a visual creative. This technique, officially called chroma keying, is how you place your subjects anywhere your imagination can take them—from distant planets to sleek virtual studios. It's a cornerstone of modern production, but achieving a professional, believable result requires precision and a safe, reliable workflow.
This guide is your roadmap to getting it right from the very start. At Virtuall, we're dedicated to building responsible, studio-grade tools for creative professionals. Our Creative AI OS is designed to enhance your entire production pipeline. If you're ready to see how it can transform your background creation and compositing, you can give VirtuallPRO a try. If you haven't generated anything with us before, you can try it for free.
More Than Just a Green Sheet
Before we get into the nitty-gritty of lighting and camera settings, let's be clear about one thing. The magic isn't in the green fabric itself. It's in the compliant and repeatable workflow that follows.
A great green screen shot is the foundation for a believable final composite. Get it right on set, and post-production becomes a creative playground. Get it wrong, and you're in for hours of frustrating fixes.
This guide breaks down the entire process, from setting up your lights to exporting the final polished video. These are the same studio-grade techniques professionals rely on to deliver clean, seamless results, every single time. A disciplined approach ensures that your creative work is not only imaginative but also produced in a safe and compliant manner.
Setting the Stage for a Perfect Key
The secret to a great composite isn’t some magic filter or expensive plugin. It’s forged on set, long before your footage ever hits an editing timeline.
Mastering the fundamentals of your shoot is the single most impactful thing you can do to make sure your green screen background works for you, not against you. Think of it as preventative medicine for your post-production workflow—it will save you countless hours of tedious, soul-crushing fixes down the line.
The entire process, from prepping your shoot to polishing the final composite, is built on this foundation.
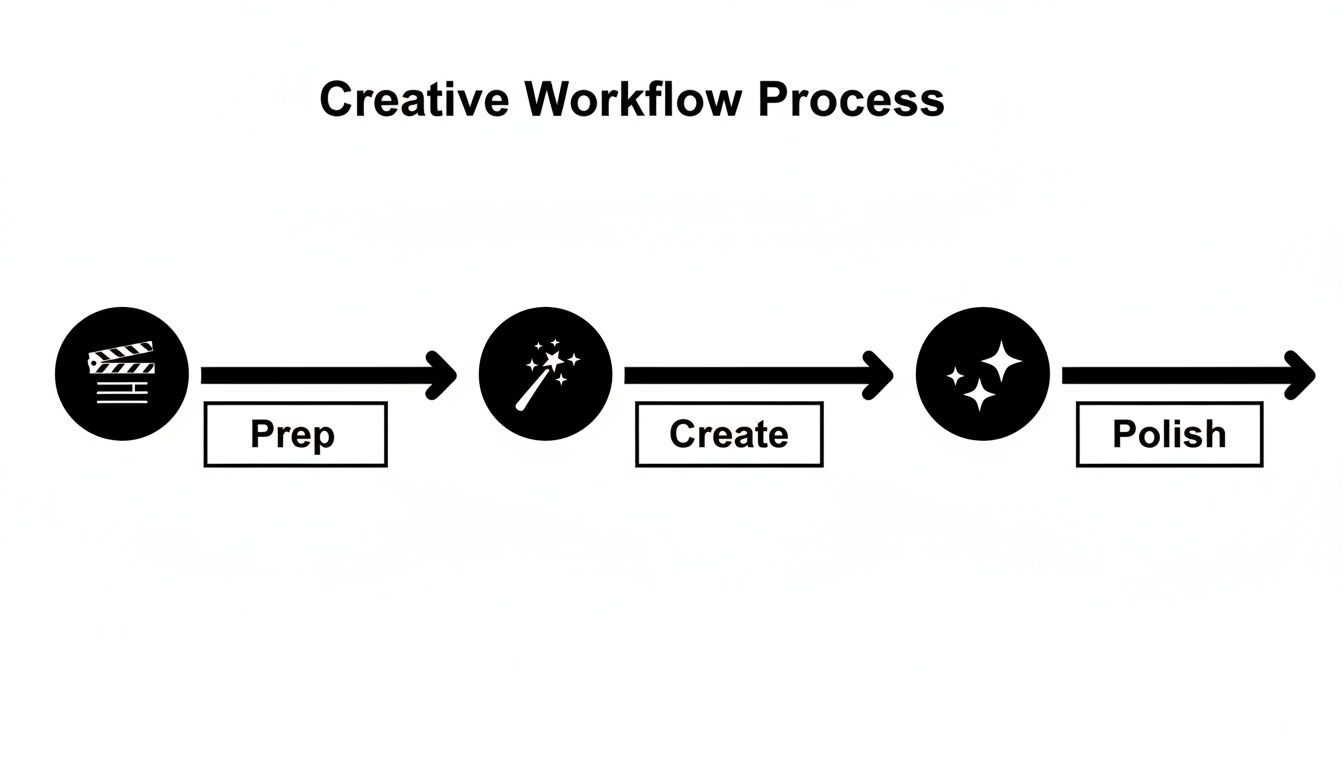
As you can see, solid preparation is the non-negotiable first step. It directly dictates the quality of everything that follows.
Achieving an Evenly Lit Screen
Your number one goal is to light the green screen itself into a flat, even canvas of pure colour. Shadows, hotspots, and visible seams are the enemies of a clean key. They create dozens of different shades of green that just confuse the keying software, leaving you with a patchy, unprofessional mess.
To get around this, use large, soft light sources. Softboxes or big diffusion panels are your best friends here, as they spread light evenly and kill harsh glare. Place lights on either side of the screen, aiming for a consistent field of light from corner to corner. Use your camera’s monitoring tools, like a waveform monitor or false colour, to hunt down and eliminate any uneven patches before you even think about hitting record.
A classic rookie mistake is lighting the subject and the screen together. Don't do it. Always light them as two separate elements. This separation is key to stopping your subject's shadow from falling on the screen and creating a keying nightmare.
Your keying quality lives and dies by your lighting setup; understanding the best lighting for video recording will give your footage a professional edge that makes compositing a breeze.
Subject Lighting and Separation
Okay, so your screen is perfectly lit. Now, you need to light your subject separately to match the background you plan on adding later. If your final scene is a bright, sunny beach, your on-set lighting should feel like that. This is where your artistic eye comes in. A standard three-point lighting setup (key, fill, and backlight) is the perfect place to start.
The backlight is especially critical for green screen work. It creates a subtle, crisp edge around your subject, helping to literally lift them off the background and define their silhouette. This makes it so much easier for the software to tell the foreground from the background, giving you clean edges on tricky details like hair.
To help you keep track of these crucial on-set details, here's a quick checklist.
On-Set Checklist for Flawless Chroma Key
| Element | Optimal Setting or Action | Why It Matters for a Clean Key |
|---|---|---|
| Screen Lighting | Evenly lit with large, soft sources | Eliminates shadows and hotspots that confuse keying software. |
| Subject Lighting | Lit separately from the screen | Prevents shadows on the screen and allows lighting to match the final background. |
| Backlight | Use a subtle rim light | Creates separation and clean edges, especially for hair and fine details. |
| Colour Subsampling | Record in 4:2:2 or higher | Preserves colour data needed for sharp, block-free edges. |
| Shutter Speed | Double your frame rate (e.g., 1/100 for 50fps) | Minimises motion blur, which is incredibly difficult to key cleanly. |
| ISO | Keep as low as possible | Reduces digital noise and grain that can interfere with the key. |
| Wardrobe | Avoid green and highly reflective items | Prevents parts of the subject from being keyed out or causing green spill. |
This table isn't exhaustive, but running through these points before every take will save you a world of pain in post-production.
Camera Settings for Success
Even with perfect lighting, the wrong camera settings can torpedo your footage. Here are the absolute must-haves to dial in:
- Colour Subsampling: This one is huge. Record in a codec with a colour subsampling of at least 4:2:2. Formats like 4:2:0 aggressively compress colour information to save space, and the result is often blocky, jagged edges on your keyed footage.
- Shutter Speed: Use a faster shutter speed than you might normally. A good rule of thumb is to double your frame rate (so, 1/100 shutter for 50fps footage). This keeps motion blur to a minimum, because blurry edges are a keyer’s worst enemy. You can learn more about how this setting interacts with your image in our article on depth of field.
- ISO and Aperture: Keep your ISO as low as your camera will allow to reduce noise. Grainy footage is just another element that complicates the keying process. Instead of bumping the ISO, open up your aperture to let in more light. As a bonus, this will also help create a softer, out-of-focus background that’s even easier to key.
Wardrobe and Prop Considerations
Last but not least, what your subject wears matters—a lot. Avoid anything green, obviously, as it will get keyed out right along with the background and make your talent look transparent.
Also, watch out for highly reflective items like shiny jewellery, patent leather shoes, or even glossy glasses. These can bounce green light from the screen straight back into the camera lens, creating nasty green spill that’s tough to clean up. Stick to matte finishes and non-green colours, and you'll be in great shape.
Crafting Your Perfect Background Plate
Alright, you’ve nailed your green screen footage. The lighting is even, the wardrobe is clean, and your subject looks fantastic. Now for the fun part: building the world they’ll live in. The background plate is what sells the entire illusion, turning a simple studio shot into a believable, immersive scene.

Sure, you could grab some stock footage. It’s a quick fix. But if you’re aiming for a professional look, you need a background that feels like it was made for your shot, not just grabbed from a generic library. That means either shooting it yourself with precision or generating it with intent.
The Traditional Approach: Shooting Live-Action Plates
The classic method is to go out and shoot your own background plate. This route gives you total control over the environment, but it demands obsessive attention to detail. If the perspective, lighting, or camera movement is off by even a fraction, the final composite will feel jarring and unnatural to the viewer. The magic is lost.
To get it right, you have to treat the background shoot like a perfect mirror of your green screen setup.
- Match the Lens: Use the exact same lens and focal length you used on your subject. A character filmed on a 50mm lens will look completely wrong when dropped into a background shot with a 24mm wide-angle. The perspective just won't line up.
- Replicate Camera Movement: If your camera was on a dolly or had a subtle handheld drift, your background plate needs the same motion. Motion control rigs are the gold standard here, but with careful planning and on-set tracking markers, you can pull it off manually.
- Align Lighting and Angle: This is non-negotiable. If your subject was lit from the left with soft, diffused light, your background's main light source must come from the same direction. Camera height and angle also have to be identical to create a believable eye-line.
Here’s a pro-tip that has saved me countless hours in post: always shoot a "clean plate" on your green screen set. Just record 10-20 seconds of the empty set after your talent leaves. It's invaluable for fixing tricky shadows or reflections later.
The Modern Workflow: AI-Powered Background Generation
Shooting your own plates offers control, but let's be honest—it can be expensive and a logistical nightmare. Need a shot of a futuristic Tokyo cityscape at sunset? In the past, that meant a massive VFX budget or a very, very lucky location scout.
Today, there's a much more direct and creatively liberating way.
This is where VirtuallPRO's Creative AI OS completely changes the game. Instead of settling for a background that might work, you can generate the exact background you need from a simple text prompt. We're not just talking about a static image; we're talking about crafting a bespoke environment that perfectly matches your creative vision.
With VirtuallPRO, you can generate stunningly photorealistic or uniquely stylised backgrounds without ever leaving your project workspace. Imagine typing "dystopian neon-lit alleyway, raining, with steam rising from vents, anamorphic lens flare" and getting a high-resolution plate ready for compositing in moments.
Maintaining Consistency with an AI Art Director
One of the biggest headaches in any production is keeping the visuals consistent across multiple shots. This is where Nyx, our AI Art Director, steps in to orchestrate the entire process. Nyx helps you generate cohesive scenes, not just isolated images, ensuring the lighting, architecture, and mood stay locked in from one angle to the next.
This AI-guided workflow gives you incredible creative speed and flexibility. You can test out different times of day or weather conditions instantly, without the immense overhead of a reshoot. It frees you from logistical chains, letting you focus purely on the story you want to tell. It’s a studio-grade solution built for how fast modern productions need to move.
Putting It All Together: Keying and Compositing Like a Pro
Alright, this is where the real magic happens. It’s that moment where your carefully lit foreground finally meets its new home, and the two become one seamless, believable shot. This process is part technical wizardry, part artistic instinct. Getting this right is what separates the amateurs from the pros.

Whether you're deep in a traditional compositing suite or working inside the VirtuallPRO ecosystem, the fundamentals don't change. The end goal is always the same: make the edit totally invisible. You want to trick the viewer’s eye into accepting the new reality you’ve built from scratch.
Pulling a Clean Matte
The first major hurdle is "pulling the key," which is just a fancy way of saying you’re creating a matte.
Think of a matte as a digital stencil. It’s a simple black-and-white image where white represents your subject (the opaque parts) and black is the green screen you want to disappear (the transparent parts). Anything in between—the greys—is semi-transparent. This is absolutely critical for handling tricky details like motion blur or soft, out-of-focus edges.
Most keying software, from simple filters to heavy-hitters like Keylight, works by targeting that specific shade of green and punching it out. Your hard work on set, getting that green screen perfectly flat and even, is about to pay off right here.
A decent first pass will get your subject isolated, but the real craft is in the edges. You'll almost always need to fine-tune the matte to preserve fine details, especially around hair—the classic nightmare for every compositor. Don't be shy about layering your keys. I often use a hard "core" matte for the solid parts of the body and a separate, softer matte just for the delicate edges.
De-Spill and Edge Refinement
Even with flawless lighting, you’re going to get some green light bouncing off the screen and contaminating your subject. It shows up as a faint green fringe around their outline. We call this spill, and getting rid of it is non-negotiable for a natural-looking composite.
De-spill tools work by neutralising that green contamination, usually by pushing the colour towards its opposite (magenta) or by borrowing nearby colours to fill it in.
Here’s a classic rookie mistake: going way too hard on the de-spill. It can suck the life right out of skin tones, leaving your subject looking grey and sickly. The trick is to be gentle. Apply just enough to kill the green halo without messing with the subject’s natural colour.
This step is so important. Nothing screams "bad green screen" louder than that tell-tale green glow. While the history of cinema in places like Denmark dates back to 1897, the nitty-gritty technical details of how chroma keying evolved are harder to pin down. Still, the goal has always been believability, and spill is the number one enemy of that.
Matching Colour and Light Direction
Once you have a clean, spill-free matte, you can finally drop your subject into their new world. But you're not done yet. The composite will fall apart unless the lighting on your subject is a perfect match for the lighting in your background plate.
This comes down to a few key adjustments:
- Colour Correction: Your black levels, white levels, and midtones have to match between the foreground and background. If your background is a warm, golden-hour sunset, your subject can't be lit with cool, blue light. It just won't work.
- Light Direction: Pay attention to the main light source in the background. If the sun is coming from the right in the plate, your key light on the subject must also come from the right.
- Light Quality: Is the background light hard or soft? A bright, sunny day casts sharp, defined shadows. An overcast day creates soft, diffused light. You should have planned for this on set, but you can definitely tweak and refine it in post-production.
This is where a good eye for detail is everything. Even a tiny mismatch in colour temperature or shadow direction can make the whole shot feel disconnected. To really nail this, it's worth exploring the latest AI tools for video editing, which can offer some incredibly powerful ways to automate colour matching.
Grounding Your Subject in the Scene
The final touches are what truly sell the illusion. Your subject needs to feel like they exist in the environment, not like a sticker slapped on top of it.
- Create Realistic Shadows: Your subject has to cast a shadow on the ground or objects behind them. A common trick is to duplicate your subject's layer, crush it to black, then blur and distort it to match the angle of the light source.
- Add Atmospheric Effects: Does the background have a bit of fog, haze, or even a subtle lens flare? You should add a whisper of those same effects over your foreground subject. This little step does wonders for integrating them into the scene's atmosphere.
- Subtle Edge Blurring: The edges from your key can sometimes look unnaturally sharp. Adding a tiny, one-pixel blur can soften them just enough to blend more naturally with the background footage, which always has a little softness from the camera lens. For a deeper dive on manipulating visual elements, check out our guide on using 3D objects in After Effects.
By carefully layering all these elements—a clean key, precise de-spill, matched lighting, and grounding effects—you're no longer just combining clips. You're building a single, seamless reality.
Taming the Green Screen Workflow with a Team
Creative projects today are a team sport. Once you've nailed the green screen shoot and your background plates are ready, the real work begins: managing that chaos across artists, directors, and producers. This is where an organised workflow isn't just nice to have—it's what saves projects from costly mistakes and keeps everyone on the same page.
A truly collaborative setup is more than just a shared Dropbox folder. You need a central hub where every asset is tracked, every version is logged, and feedback is tied directly to the specific frame being discussed. This is the whole idea behind VirtuallPRO—creating that single source of truth for your entire creative pipeline.
The Secret to Clean Handoffs
The handoff from the keying artist to the compositor is where so many projects stumble. Sending a heavily compressed MP4 is like asking a master painter to work on a blurry, pixelated canvas. It just kneecaps the quality from the start.
To keep all that precious detail, you need to work with high-bitrate codecs. But even more important is making sure your file format supports an uncompressed alpha channel when you pass the keyed footage along.
- Alpha Channel: This is the transparency map—that matte we created earlier—that tells the software which pixels are solid, which are see-through, and everything in between.
- High-Bitrate Codecs: Formats like Apple ProRes 4444 or DNxHR 444 are the industry standard for a reason. They pack in huge amounts of colour information and, crucially, a perfect, uncompressed alpha channel. This ensures the next person in the chain gets a clean plate to work with.
When you get the file format right, you eliminate a ton of technical headaches down the line. It lets your team focus on being creative instead of troubleshooting broken files.
For anyone working in a professional green screen pipeline, understanding which file format to use at each stage is crucial. Here's a quick comparison of the heavy hitters.
Comparing File Formats for Professional Workflows
| Format | Ideal Use Case | Key Advantage for Compositing |
|---|---|---|
| Apple ProRes 4444 XQ | Final delivery of keyed footage for high-end compositing and colour grading. | Provides the highest possible quality with a lossless 16-bit alpha channel. |
| DNxHR 444 | Cross-platform (Windows/Mac) workflows needing an uncompressed alpha. | Avid's equivalent to ProRes 4444, offering excellent quality and compatibility. |
| OpenEXR (with PIZ compression) | VFX pipelines where multiple layers of data (deep data, extra channels) are needed. | The industry standard for CGI and heavy VFX; supports multi-channel workflow. |
| PNG Sequence | Simple composites or graphics work where video codecs are overkill. | Lossless quality with excellent alpha support, but can result in many files. |
Choosing the right format from the start prevents quality degradation and ensures that the alpha channel—the most critical piece of the puzzle—arrives intact for the compositor.
No More Final_Shot_v3_really_final.mov
Let's be honest, a director shouldn't have to hunt through an email chain to find a review link, only to wonder if they're even looking at the latest version. A professional workflow demands a central spot for versioning and feedback.
Inside a shared workspace like VirtuallPRO, you can stack new versions of backgrounds and composites on top of each other. This gives the whole team a clear visual history of how a shot has evolved. Directors and producers can then drop time-stamped notes and draw directly on the frame.
This is a total game-changer. It gets rid of all the guesswork. Instead of a vague email saying, "make the sky a bit more dramatic," a producer can literally circle the sky and write, "Add more stormy clouds here and boost the contrast."
That kind of clarity just makes everything faster. It keeps the team aligned, accountable, and working from the same playbook. If you want to dig deeper into building these team dynamics, check out our guide on team collaboration best practices.
Building Repeatable Production Pipelines
Now, what happens when you’re not just doing one shot, but a whole campaign with dozens of assets that all need to look and feel the same? Doing it all by hand, one by one, is slow and a recipe for inconsistency. You need a repeatable pipeline.
This is where VirtuallPRO’s Blueprints come in. A Blueprint is basically a pre-built production flow. It can define everything from the AI models used to generate backgrounds to the specific colour grading presets applied to the final shot.
A Blueprint for a new product campaign, for instance, could automate:
- Generating a background using a specific style prompt.
- Applying a pre-approved keying and de-spill setting.
- Compositing the subject and applying the brand's official colour look-up table (LUT).
By using Blueprints, you guarantee that every shot in the campaign hits the same high standard for quality and visual style. This kind of organised, governed approach is what separates amateur setups from safe, compliant, studio-grade production. While the Danish film industry has a rich history, its modern evolution, like filmmaking globally, depends on these kinds of structured digital workflows to manage ever-more-complex visual effects. For more on the region's cinematic heritage, you can explore the history of cinema in Denmark.
Troubleshooting Common Green Screen Problems
Even with the best prep in the world, a green screen shoot can throw a curveball your way. A flicker in the lights, a stubborn wrinkle, an unexpected reflection—it happens. But don't hit the panic button.
Most of these common issues have a fix, whether it's on set or in post. Think of this as your field guide to saving a tricky shot. Understanding what goes wrong (and why) will help you fix problems today and avoid them entirely on your next shoot.
The Patchy Key from Uneven Lighting
This is the number one killer of clean composites. You pull your footage into your keyer, and instead of a perfect cutout, you get a noisy, flickering mess. Parts of your subject look semi-transparent.
Nine times out of ten, this is because the green screen itself wasn't lit evenly.
On-Set Fix: Before you even think about hitting record, pull up a waveform monitor. This is your source of truth. You're looking for a perfectly flat, horizontal line where the green screen is. That line tells you the illumination is dead-even. Also, physically walk the screen and kill any wrinkles. Those little folds create tiny shadows that your keyer will hate.
Post-Production Fix: If the footage is already in the can, you can try layering your keys. This means using multiple instances of your keying effect, each one dialled in for a different shade of green. One keyer tackles the bright spots, another gets the darker, shadowed areas. It takes a bit more finessing, but it can absolutely salvage a shot.
Fighting Back Against Green Spill
You’ve pulled a technically perfect key, but your subject is glowing with a faint green halo, especially around their hair or on their shoulders. That’s green spill.
It’s just light from the screen bouncing onto your subject and contaminating their natural colours. This is a dead giveaway of a cheap-looking composite.
Your eye might not know exactly what's wrong with a shot, but it can always tell when something feels fake. Taming spill is what separates amateur work from a believable, professional composite.
On-Set Fix: Distance is your best friend here. The further your subject is from the screen, the less green light will bounce back onto them. Simple physics. Also, a good, strong backlight (or "hair light") helps immensely. It creates a crisp, defined edge that carves your subject out from the background.
Post-Production Fix: Every decent keying tool has a de-spill function. The trick is to be subtle. If you push it too hard, you’ll desaturate skin tones and make your subject look sickly and unnatural. Apply it gently until the green fringe is gone, but the core colours of your subject are still vibrant and true.
Mismatched Perspective and Scale
This one is less about the key itself and more about the final illusion. The subject just doesn't look like they belong in the background. Maybe they look like a giant, the camera angle feels off, or the lighting is just completely wrong.
This is where you have to start thinking like a compositor.
- Scale and Position: Don't be afraid to tweak the size and placement of your subject. Look for real-world objects in your background plate—a doorway, a chair—and use them as a reference to get the scale right.
- Colour Matching: This is huge. Use your colour correction tools to match the black levels, white levels, and overall colour temperature. If the background plate is a cool, overcast day, your subject can't be lit with warm, golden-hour light.
- Simulate Depth: A quick way to sell the shot is to add a very slight blur to your background plate. This mimics camera depth of field and instantly makes your subject feel like the true point of focus in a real 3D space.
Common Green Screen Questions
Even with the best guide, things always pop up on set or in the edit. Here are a few answers to the questions we see most often from people dialing in their green screen workflow.
Can I Use a Blue Screen Instead of Green?
Yes, absolutely. The choice between green and blue almost always comes down to the colours on your subject.
Green became the industry go-to largely because modern digital camera sensors are most sensitive to green. This usually gives you a cleaner key with less noise.
But if your subject is wearing green, has green in their branding, or is a plant, a blue screen is your best bet. Otherwise, you'll end up keying out parts of your foreground. Blue screens do need about one extra stop of light to get a proper exposure, but they can be a lifesaver for subjects with blonde hair, as they cause less colour spill that can contaminate lighter hair tones.
What’s the Biggest Lighting Mistake Beginners Make?
The single most common (and damaging) mistake is lighting the subject and the screen with the same lights. This is a recipe for a bad key. It guarantees you'll cast your subject's shadow onto the screen, creating an uneven, blotchy background that's impossible to pull a clean key from.
The professional approach is to treat the screen and the subject as two completely separate lighting setups. First, light your screen. Use large, soft light sources to paint it with a flat, even field of colour. Only then do you light your subject to match the background you intend to use, shaping them with key, fill, and backlights.
How Does AI Background Generation Actually Help?
AI background generation completely flips the script. Instead of finding a background that works, you can create the perfect one on demand.
Traditionally, you were stuck with what you could find in a stock library or afford to shoot on location. This always meant compromising your creative vision to fit what was available.
With an AI tool like VirtuallPRO, you can generate an endless variety of high-res backgrounds from a simple text prompt, matching the exact mood, lighting, and composition your story needs. This gives you enormous creative freedom and radically speeds up pre-production. You can brainstorm, test, and approve virtual locations in minutes, without the huge costs and delays of physical scouting or travel.
Ready to move beyond generic backgrounds and create the exact world your project needs? With VirtuallPRO, you can direct your own AI-powered creative production, generating stunning, consistent visuals in a governed workspace built for professionals. Start creating with VirtuallPRO today.