How to Create a Studio-Grade T Shirt Mockup with AI
Learn to create a realistic t shirt mockup using 3D and AI. This guide covers everything from asset prep to final rendering for designers and creative teams.
A great t-shirt mockup is your first real gut check on a new design. It’s that moment you see your flat, 2D art come to life on what looks and feels like a real product, complete with authentic lighting, shadows, and fabric textures. The Creative AI OS provides a responsible, compliant, and safe studio-grade platform for visual creative work. To see how it works, you can try our Creative AI OS, VirtuallPRO, for free and follow along with this guide.
Moving Beyond Basic T-Shirt Mockups
Let’s be honest: flat, lifeless templates just don’t cut it anymore. The new standard for product visualisation is all about photorealism—mockups that feel so tangible you could almost touch them.
This guide walks you through a studio-grade, AI-driven workflow for creating dynamic mockups that not only look incredible but actually tell a story. It’s time to ditch the simple placeholders and start creating assets that actually move the needle.
In today’s market, you’re not just showing a design; you’re selling a vision. High-fidelity visuals aren’t a nice-to-have, they're essential for any brand trying to connect with its audience. This is where combining detailed 3D models with AI-generated textures gives you a serious edge, creating assets ready for any professional campaign.
The Growing Demand for Quality Visuals
The apparel world is buzzing, and with it, the demand for killer product imagery. Take Denmark's T-shirt market, for example. In 2025, revenues are set to hit US$91.31 million, growing at a steady clip of 3.41% annually.
That number isn't just a statistic—it reflects a real consumer appreciation for casual fashion that values minimalist style and high quality. For creative teams, this highlights a massive opportunity where a top-tier t-shirt mockup is crucial for visualising designs before a single garment is made. You can dig into more data on the Danish T-shirt market on Statista.
More growth means more competition. To break through the noise, your products have to look their absolute best, and a static, unconvincing mockup won't get you there.
A great mockup bridges the gap between a digital design and a physical product. It’s not just a technical step; it’s a critical part of the creative and commercial process that helps stakeholders and customers alike believe in the final vision.
Why a Studio-Grade Workflow Matters
A professional, structured workflow is what separates amateur output from studio-grade results. It delivers consistency, realism, and scalability—three things that old-school methods just can't juggle at the same time.
Here's what makes an AI-assisted approach so much better:
- Unmatched Realism: By mixing 3D models with AI-generated textures, you can perfectly simulate everything from the fine weave of slub cotton to the subtle drape of a tri-blend. You just can’t get that level of detail with a basic 2D template.
- Creative Flexibility: A 3D environment gives you total control. Tweak the lighting, switch camera angles, or drop in a new background scene in seconds. You can instantly generate mockups for a clean studio shoot, a gritty lifestyle campaign, or a simple e-commerce listing, all from a single core asset.
- Scalability for Campaigns: This is where the real magic happens. With a system like VirtuallPRO, you can set up one 'Blueprint' and then let the AI generate hundreds of variations—different colours, designs, or scenes—with perfect consistency. Your team can produce an entire campaign’s worth of visuals in a fraction of the time.
Preparing Your Assets for an AI-Powered Workflow
A killer t shirt mockup doesn’t just happen in the final render. It starts way earlier. The old saying "garbage in, garbage out" is especially true here—the quality of your final image is a direct reflection of the assets you start with. A sloppy model or a pixelated graphic will tank your results, no matter how clever your AI tools are.
This section is all about getting the groundwork right. We'll walk through exactly how to prep your 3D t-shirt model and your 2D design files for a modern AI pipeline. Nailing this stuff upfront saves you from the common pitfalls that derail projects and ensures your creative vision comes through loud and clear.
The Anatomy of a Perfect 3D T-Shirt Model
Think of your 3D model as the canvas. For it to fold, wrinkle, and react to light in a believable way, its underlying structure has to be solid. Just like a real garment, poor construction will always show.
Here’s what I always check for in a studio-grade model:
- Clean Topology: This is all about the flow of the polygons that make up the 3D mesh. When the topology is clean and organised, the fabric deforms naturally, creating realistic folds. If the geometry is messy and overlapping, you'll get weird visual glitches and artifacts during the render. It’s a dead giveaway of an amateur model.
- Proper UV Mapping: UVs are basically the flattened-out, 2D version of your 3D model's surface. They tell the software precisely how to wrap a flat fabric texture or your graphic onto the t-shirt. Without well-laid-out UVs, you'll get distorted designs and ugly, visible seams. This part is completely non-negotiable.
- Appropriate File Formats: Just stick to the industry standards. .obj or .fbx are your best friends here. They're universally supported and do a great job of holding onto crucial data like the model's geometry, UV coordinates, and material info. This guarantees a smooth journey between different tools in your workflow.
Using a shared workspace like VirtuallPRO to organise these assets is a game-changer. It creates a single source of truth, so everyone on the team knows they're grabbing the latest, approved file. This simple habit prevents so much confusion and costly rework down the line.
Preparing Your 2D Design for Flawless Application
Your 2D graphic is just as critical as the 3D model it’s going on. A low-quality design file will look fuzzy and unprofessional, instantly shattering the realism you're working so hard to create.
For any 2D design file, these are the absolute must-haves:
- High Resolution: Always, always start with a high-resolution file. Ideally, you’re using a vector format like .ai, .eps, or .svg. If it has to be a raster image, make sure it’s at least 300 DPI. This is the only way to ensure your design stays crisp and sharp, even in close-up shots.
- Transparent Background: Your design needs to be saved with a transparent background, which means using a format like .png. This lets you place the graphic cleanly onto the t-shirt without any ugly white or coloured boxes framing it.
- Correct Colour Profile: Stick to a standard colour profile like sRGB. This ensures your brand colours look the same on your screen, in the render, and on a customer's device. Getting the colours wrong can completely misrepresent the final product. For a deeper dive, check out our guide on how to design a t-shirt.
A well-prepared asset is an investment in efficiency. Every minute spent cleaning up a model or exporting a design correctly saves hours of frustration and fixes in the later stages of production.
This methodical prep work is what allows you to really unlock what AI can do. The tech is moving incredibly fast, and for a look at what's on the horizon, recent mass AI image generation research offers some fascinating insights into the tools shaping visual content.
With your assets perfectly prepped, you're ready for the fun part—bringing your t shirt mockup to life.
Generating and Applying Realistic Fabric Textures
This is where the magic really happens. A great t-shirt mockup isn’t just about the shape and the graphic on top; it’s about making someone feel the fabric. Getting beyond flat, generic surfaces is what separates a decent visual from a studio-grade asset that feels real enough to touch.
Instead of endlessly searching for stock patterns, you can now use AI to generate completely custom, hyper-realistic fabric textures. This is a massive creative jump. It lets you go from vague ideas to specific, tangible results with just a few descriptive words.
Prompting for Perfect Fabric Details
Crafting the right prompt is like giving directions to a master tailor. The more detail you give, the more authentic the final piece will be. Think about the exact material you want to see.
Don't just ask for a "cotton texture." Go deeper:
- "Seamless texture of slub cotton in an off-white colour, showing subtle variations in thread thickness, high detail, photorealistic." This prompt nails the slightly irregular, organic look of slub cotton.
- "Heather grey jersey knit fabric, fine interlocking stitches visible, soft appearance, seamless 4K texture." Here, you’re guiding the AI to create that classic, slightly mottled effect of a heather blend.
- "Vintage, heavily washed black cotton t-shirt fabric, faded and slightly worn, soft pilling visible, seamless." This prompt adds history and character, perfect for retro or lifestyle brands.
The real goal here is to create more than just a colour map. For true realism, you need a full set of textures that work together. That means generating normal maps to capture the fine weave and roughness maps for how the light hits the surface. It’s this combination that makes a fabric look real under any lighting.
The flowchart below shows how your 3D model and 2D design come together right before you apply these textures.
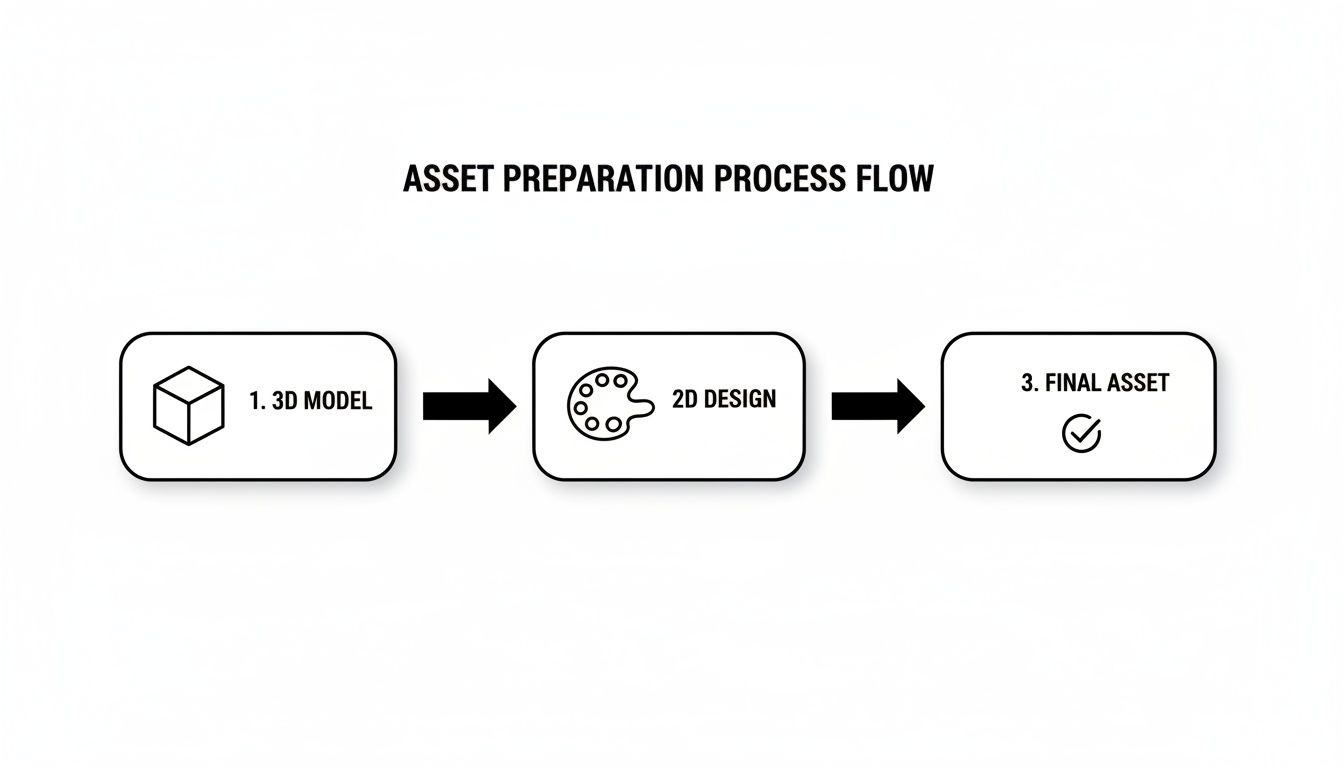
As you can see, both the 3D model and the 2D design need to be prepped on their own before they can be merged and textured effectively.
To help you get started, here's a quick guide on how to structure your prompts for different common t-shirt fabrics.
AI Texture Generation Prompt Guide
| Fabric Type | Core Prompt Keywords | Negative Prompts (To Avoid) | Expected Outcome |
|---|---|---|---|
| Slub Cotton | slub cotton, irregular thread, subtle texture, organic weave | smooth, uniform, synthetic, plastic |
A soft, textured fabric with natural-looking, uneven threads. |
| Jersey Knit | jersey knit, fine stitches, interlocking loops, soft, heathered | heavy weave, canvas, shiny, rigid |
A classic, smooth t-shirt fabric with a visible but fine knit pattern. |
| Pima Cotton | pima cotton, extra-long staple, smooth, soft sheen, luxury | rough, coarse, pilling, matte |
A high-end, silky-smooth fabric with a slight lustre. |
| Washed Vintage | heavily washed, faded, worn, soft pilling, vintage cotton | new, crisp, dark, sharp |
A fabric that looks and feels lived-in, with softened colours and texture. |
This table should give you a solid foundation for experimenting. The key is to be descriptive and think like a textile designer.
Applying Textures for a Believable Result
Once your AI has generated the texture maps, it's time to apply them to your 3D model. This is where preparing clean UV maps earlier really pays off. Think of the UVs as a pattern guide, telling the software exactly how to wrap your fabric around the t-shirt without ugly stretching or visible seams.
You’ll typically do this in a material editor within your 3D software. Here, you connect your generated maps to the right channels: the colour texture, the normal map (for the bumps and weave), and the roughness map (for shininess). Getting the scale right is critical. A texture that’s too big or too small will instantly shatter the illusion. You want the weave of the fabric to look natural relative to the size of the t-shirt. For a deeper dive, check out our guide on creating seamless textures.
Grounding Your Mockup in a Real-World Context
Why does this level of detail matter so much? Because the apparel industry is booming, and standards are rising. In Denmark, for instance, the clothing manufacturing sector—a major player in T-shirt production—is projected to include 357 businesses by 2025. That market is growing at a 4.0% compound annual growth rate and is expected to hit €710.9 million by 2026.
This growth signals a huge demand for quality and sophisticated design. Tools that bridge traditional manufacturing with modern creative workflows are no longer a nice-to-have; they're essential. To nail those tiny but crucial details, from fabric textures to stitch lines, many teams are turning to AI-powered image editing to refine their final renders.
For creative teams, this trend is clear: delivering photorealistic visuals is more important than ever. By carefully generating and applying these fabric textures, your t-shirt mockup won't just look professional—it will accurately represent the quality and feel of the final product. That level of detail builds trust and makes your designs infinitely more compelling.
Mastering Your Virtual Studio Lighting
You’ve applied your textures, and the fabric looks incredible. Now it’s time to put that t-shirt mockup into a virtual environment that actually makes it shine.
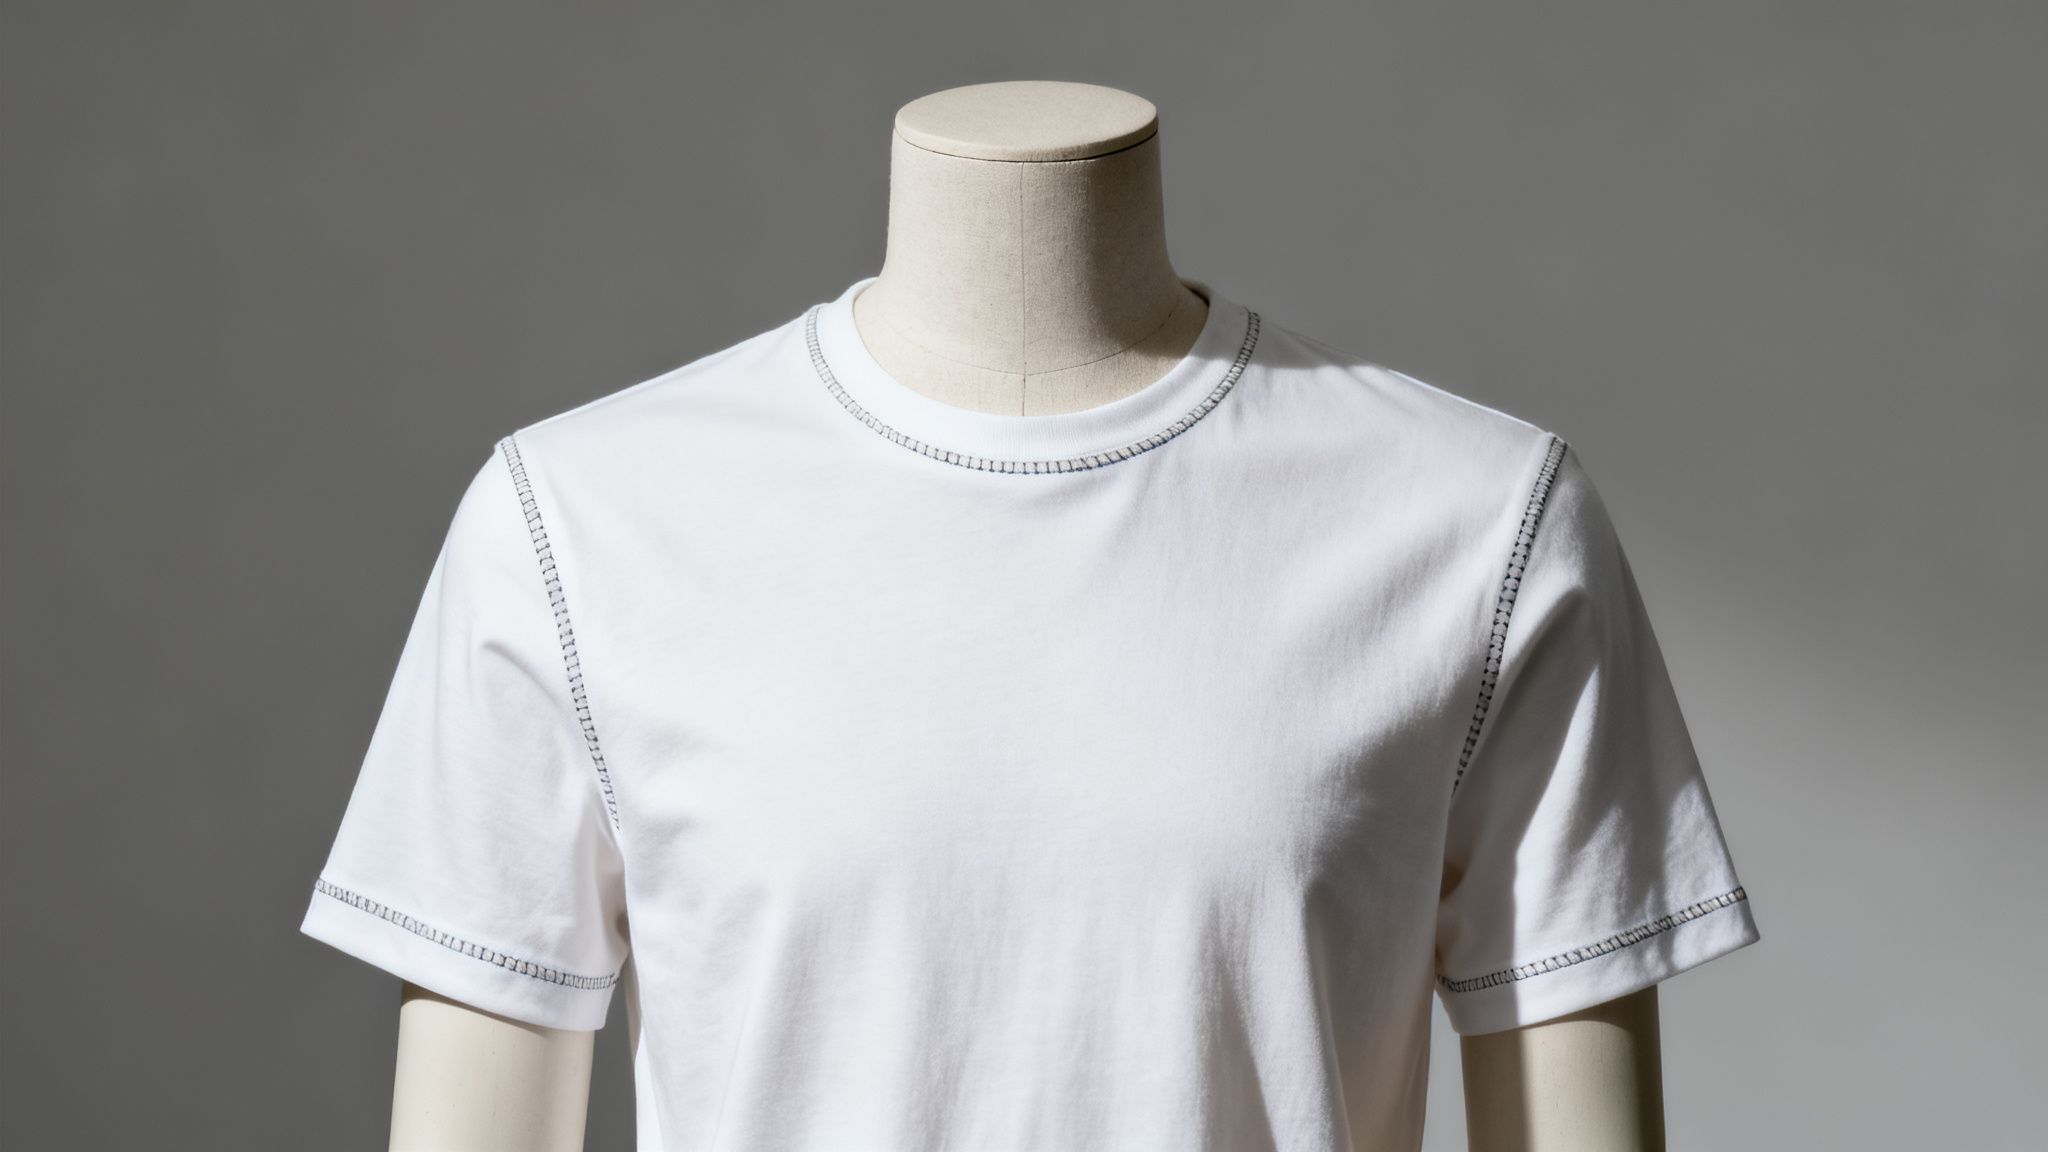
Even the most realistic model and detailed fabric will fall flat under bad lighting. This is the moment you stop being just a designer and become a virtual photographer, building a professional studio scene that sells the product. A great lighting setup doesn't just illuminate the shirt; it carves out its shape, defines its form, and sets a mood.
Building Your Lighting Scheme
The classic three-point lighting system is a timeless starting point for any product shot. It’s a reliable setup that gives you total control over highlights and shadows, making sure your t-shirt has depth and dimension.
Here's the quick breakdown:
- Key Light: This is your main light source, the brightest in the scene. Place it at roughly a 45-degree angle to your mockup to establish the overall look and cast the most important shadows.
- Fill Light: Positioned opposite the key light, this one is softer and less intense. Its job is to "fill in" the dark shadows cast by the key light, bringing back details that might otherwise get lost in the dark.
- Back Light (or Rim Light): Placed behind the t-shirt, this light creates a subtle, bright outline around the edges. This "rim light" effect is what separates your mockup from the background and gives it that clean, professional silhouette.
Once you’ve got that down, you can start experimenting. Think about simulating the soft, diffused light from a big window for a natural, indoor feel, or using a single harsh light to create dramatic shadows for a more streetwear-inspired brand.
Use HDRIs for Next-Level Realism
For the most convincing results, nothing beats a High Dynamic Range Image (HDRI). An HDRI isn't just a background picture; it's a 360-degree photo that contains a massive amount of lighting information from a real-world place.
When you use an HDRI to light your scene, it projects that real-world light—and its reflections—onto your 3D model. Suddenly, your fabric realistically reflects its surroundings, picking up the subtle blue tones from a clear sky or the warm glow of an indoor studio. This is the secret to making your t-shirt mockup look like it truly exists in a physical space.
Your choice of HDRI directly sets the mood. A bright, sunny outdoor HDRI creates a vibrant, energetic feel. A moody, overcast cityscape HDRI will produce a more subdued, pensive tone. It's an incredibly powerful storytelling tool.
Directing the Virtual Camera
Your final shot depends on more than just light; it's also about how you frame it. Your virtual camera gives you the same creative controls as a real DSLR, and learning to use them is key to showing off what makes your design special.
Pay attention to these three elements:
- Camera Angle: A straight-on shot is great for e-commerce, but don't be afraid to mix it up. A low angle can make a design feel heroic and bold, while a high angle can create a more casual, observational vibe.
- Focal Length: This controls how much of the scene is captured. A wider lens (like a 35mm) is perfect for showing the t-shirt in a larger environment, while a longer lens (like an 85mm) is ideal for flattering, portrait-style shots that isolate the product without distortion.
- Depth of Field: This is the effect where the background is softly blurred, making your subject pop. A shallow depth of field is perfect for drawing the viewer's eye straight to a specific detail on your design, like a patch of embroidery or a bold graphic.
Inside VirtuallPRO, you can save these entire virtual studio setups—the lighting, camera settings, and background—as reusable 'Blueprints'. This allows your team to generate an entire campaign of mockups with perfect brand consistency, saving countless hours of manual setup.
Rendering and Scaling Your Creative Production
You’ve built the scene, dialled in the lighting, and nailed the textures. So far, so good. Now it's time for the final step: turning that detailed 3D environment into a stack of stunning 2D images. This is the rendering stage, where your t-shirt mockup becomes a real, usable asset for your campaign.
This isn’t just about hitting a "render" button and hoping for the best. It’s about making smart trade-offs between visual quality and production speed. The choices you make right here will decide if your final images are crisp, professional, and actually delivered on time.
Optimising Your Render Settings
Before you kick off a render, it’s worth spending a few minutes fine-tuning the settings. This is all about balancing resolution, the render engine itself, and the final file formats you’ll need.
- Resolution is all about context. For an e-commerce storefront or a social media post, 2048x2048 pixels is usually plenty sharp. But if you’re prepping for a high-end print ad or a full-screen website banner, you’ll need to push it higher, maybe to 4K (3840x2160 pixels) or more. My advice? Always render for your most demanding use case first.
- Don't crank up the samples. The number of samples per pixel dictates image clarity, but it also skyrockets render time. More samples mean less noise, but you'll be waiting forever. A much better strategy is to use a moderate sample count and then let an AI-powered denoiser do the heavy lifting. It cleans up the image intelligently without killing the fine details.
- Pick the right file format. For most digital work, a .PNG with a transparent background gives you the most flexibility. If you need serious colour depth for heavy post-production, an .EXR or 16-bit .TIFF file will give your retouchers a much wider range of data to play with.
Getting these technical bits right from the start ensures your final t-shirt mockup isn't just beautiful, but actually fit for purpose. If you want to dive deeper into the technical side, we’ve broken down the product 3D rendering process in another post.
Automating Variant Creation at Scale
This is where a proper studio workflow really shows its power. Instead of rendering one image at a time, you can automate the creation of hundreds of consistent, on-brand variations from a single, perfected 3D scene. This is how you hit production scale.
Imagine the brief: the same t-shirt design, but in ten different colourways, shot against five unique backgrounds, and from three separate camera angles. Doing that by hand would be a soul-crushing, error-prone nightmare.
With a platform like VirtuallPRO, that entire job becomes an automated flow. You can set up a pipeline that automatically swaps fabric colours, cycles through different HDRI environments, and moves between predefined camera positions. The system then churns through every single combination, delivering a complete set of campaign assets with perfect consistency.
This isn't just about saving time; it's about unlocking creative freedom. When generating variations is this simple, teams can test more ideas, create more personalised content, and react to market trends faster than ever before.
This kind of efficiency is becoming non-negotiable. T-shirt consumption in Denmark, for instance, jumped by 11% in 2022, hitting 44 million units and valuing the market at $201 million. This growth, part of a $5.4 billion apparel retail scene, proves that brands need a constant stream of high-quality, diverse visuals to stand out. You can dig into the Danish t-shirt market trends on IndexBox.io. Meeting that demand requires a production method that is both fast and scalable.
Streamlining Collaboration and Governance
The job isn’t done when the render finishes. Next comes feedback, approvals, and final delivery—all of which need to happen in a controlled environment. A governed workspace is what ensures every asset stays compliant and on-brand.
Inside VirtuallPRO, the whole workflow lives in one place. This means teams can:
- Annotate Renders Directly: A creative director can drop comments and draw markups right on top of a rendered t-shirt mockup for crystal-clear feedback. No more confusing email chains.
- Manage Versions: As you implement feedback, new versions of the render are tracked automatically. This gives you a clear audit trail and stops anyone from accidentally grabbing an old, unapproved asset.
- Ensure Brand Compliance: By using locked-down 'Blueprints' for colours, logos, and lighting, you can enforce brand standards across every single asset. That control is key to maintaining a professional brand identity everywhere.
This end-to-end approach turns t-shirt mockup creation from a messy series of disconnected tasks into a single, cohesive production flow. It’s how modern creative teams go from idea to delivery with speed, consistency, and total control.
Common T-Shirt Mockup Questions
Moving to a 3D and AI workflow for a t-shirt mockup can feel like a big shift from what you're used to. It's totally normal to have questions, especially when leaving the comfort of tools like Photoshop.
Let's tackle some of the most common ones we hear from creative teams.
How Can I Make Sure My Brand Colours Are Right?
Colour accuracy is everything. It’s a non-negotiable for brand consistency, and luckily, it's straightforward to control in a 3D environment.
It all starts with your source files. Always work with a calibrated colour profile (sRGB is a safe bet) and plug the exact HEX or RGB values into your 3D software’s material editor. Lighting is the other half of the equation. Stick to neutral white light in your virtual studio to get a clean product shot without any weird colour cast throwing off your palette.
This is where a system like VirtuallPRO really shines. Its Blueprint feature lets you save precise colour palettes and lighting setups. That means every single mockup stays perfectly on-brand across the whole campaign. It’s brand governance, sorted.
Can I Show Mockups on Different Body Types?
Yes, and honestly, this is one of the biggest wins of a 3D workflow over old-school templates. You can fit your 3D t-shirt onto a whole range of digital avatars representing diverse body shapes. This just isn't possible with a flat JPEG.
You can pull from a library of 3D models or even use AI to create custom avatars for specific demographics. Inside VirtuallPRO, you can set up a production flow where our AI Art Director, Nyx, automatically generates the same t-shirt mockup across an entire lineup of virtual models. It’s how you create inclusive marketing visuals that actually connect with a wider audience, and you can do it at scale.
The ability to showcase designs on diverse body types isn't just a technical feature; it's a strategic move towards more relatable and effective visual communication. It shows customers you see them, which builds stronger brand loyalty.
What's the Real Benefit of 3D Over Photoshop Templates?
Photoshop templates are fine for quick and dirty visuals, but a 3D workflow is in a completely different league for realism, creative control, and scalability.
You see the difference immediately. With 3D, you get fabric that drapes and folds like it should, shadows that react to the form, and the freedom to show the product from any angle you can imagine.
But for professional teams, the killer feature is scalability. A platform like VirtuallPRO can automatically churn out hundreds of variants—different colours, graphics, backgrounds—all with perfect consistency. Trying to do that by hand in Photoshop would be a nightmare of manual labour and inevitable mistakes. For any serious production pipeline, 3D is the clear winner.
Do I Need to Be a 3D Expert to Do This?
Not anymore. In the past, this work demanded serious technical chops in complex 3D software. But modern platforms like VirtuallPRO are built to handle the heavy lifting for you. Our Creative AI OS orchestrates the difficult parts behind the scenes.
A basic understanding of 3D concepts helps, but it’s not essential. Teams can use pre-made Blueprints for lighting and materials and let Nyx manage the entire production. This frees up creative directors and marketers to direct high-end visuals without needing to become 3D artists. It’s about focusing on the creative vision, not getting bogged down in the technical weeds.
Ready to move beyond flat templates and create photorealistic mockups that captivate your audience? Explore VirtuallPRO, the Creative AI OS that helps you orchestrate your entire visual production pipeline. Try it for free and experience the future of creative production.